You take a photo that looks perfectly fine at first. Then later, you try to zoom in or maybe print it, and something feels off. The edges start to break. Details look soft. Faces lose that sharpness. This happens more often than expected, especially with older phone photos, screenshots, or images that have been repeatedly compressed. What once looked clear slowly turns rough.
There is now a better way to handle this.
With image upscaling, you can recover lost detail in just a few clicks. These tools don’t simply stretch the image as traditional methods do. They rebuild it. Edges come back sharper, textures look more natural, and the overall quality improves in a way that actually holds up. In other words, they help upscale image quality without making it look artificial.
The process is simple. No design skills needed, no complex tools to learn. You upload your image, choose how much you want to upscale it, and let the tool do the work.
What Is an Image Upscaler?
An image upscaler is a tool that increases an image’s size and resolution while keeping it clear, not blurry. Normally, when a low-resolution image is enlarged, the quality drops and details start to fade. An upscaler helps maintain sharpness so the image still looks clean at a larger size.
Modern upscalers use AI techniques like neural networks and super-resolution. Instead of just stretching pixels, they study the image, understand patterns, and rebuild missing details. The aim isn’t only to make the image bigger but also to make it look better and more usable.
How Image Upscaling Works

Image upscaling works by training AI models on large datasets of high-quality images. They learn how details such as edges, textures, and colors should appear, even when the original image is unclear.
When you upload a low-resolution or blurry image, the AI analyzes it, predicts missing details, and creates new pixels to improve clarity. This process is not just resizing. It’s a reconstruction.
Instead of stretching the image, the AI rebuilds textures, balances lighting, and restores color where needed. The result looks sharper, more natural, and closer to a true high-resolution image, without requiring any design skills.
Why Image Upscaler Is Used
There are a few common situations where upscaling becomes useful:
Restoring Old or Low-Quality Photos
Older cameras didn’t capture as much detail as today’s devices. When viewed on modern screens, those images often look soft or pixelated. Upscaling helps recover details and improve clarity. It can also fix images that were compressed or slightly damaged over time.
Improving Print Quality
In professional settings, image quality matters a lot. Low-resolution images can look poor when printed. Upscaling helps increase resolution so prints appear clean and sharp, which is important for branding and presentation.
Better Display on Larger Screens
An image that looks fine on a phone may not look the same on a TV or large monitor. It can lose clarity and appear blurry. Upscaling helps adjust the image so it holds up better on bigger displays. Some tools can even help you upscale image to 4k.
Zooming and Cropping Without Losing Detail
Sometimes an image includes unwanted elements, so you crop or zoom into a specific area. This often reduces quality. An upscaler can help restore lost detail and improve sharpness after cropping, making the final image look more refined.
Best Image Upscaler Tools Comparison Table
| Tool | Processing Speed | Free or Paid | Ease of Use | Batch Processing |
| Zoviz | Very fast | Free + Paid (subscription starts ~$29/month) | Very easy | Supported |
| Pixelbin | Fast | Freemium | Very easy | Supported |
| Upscale.media | Fast | Freemium | Very easy | Supported |
| Let’s Enhance | Fast | Freemium | Easy | Supported |
| Upscayl | Fast | Free (open-source) | Moderate | Supported |
| Picsart | Fast | Freemium | Very easy | Supported |
Zoviz
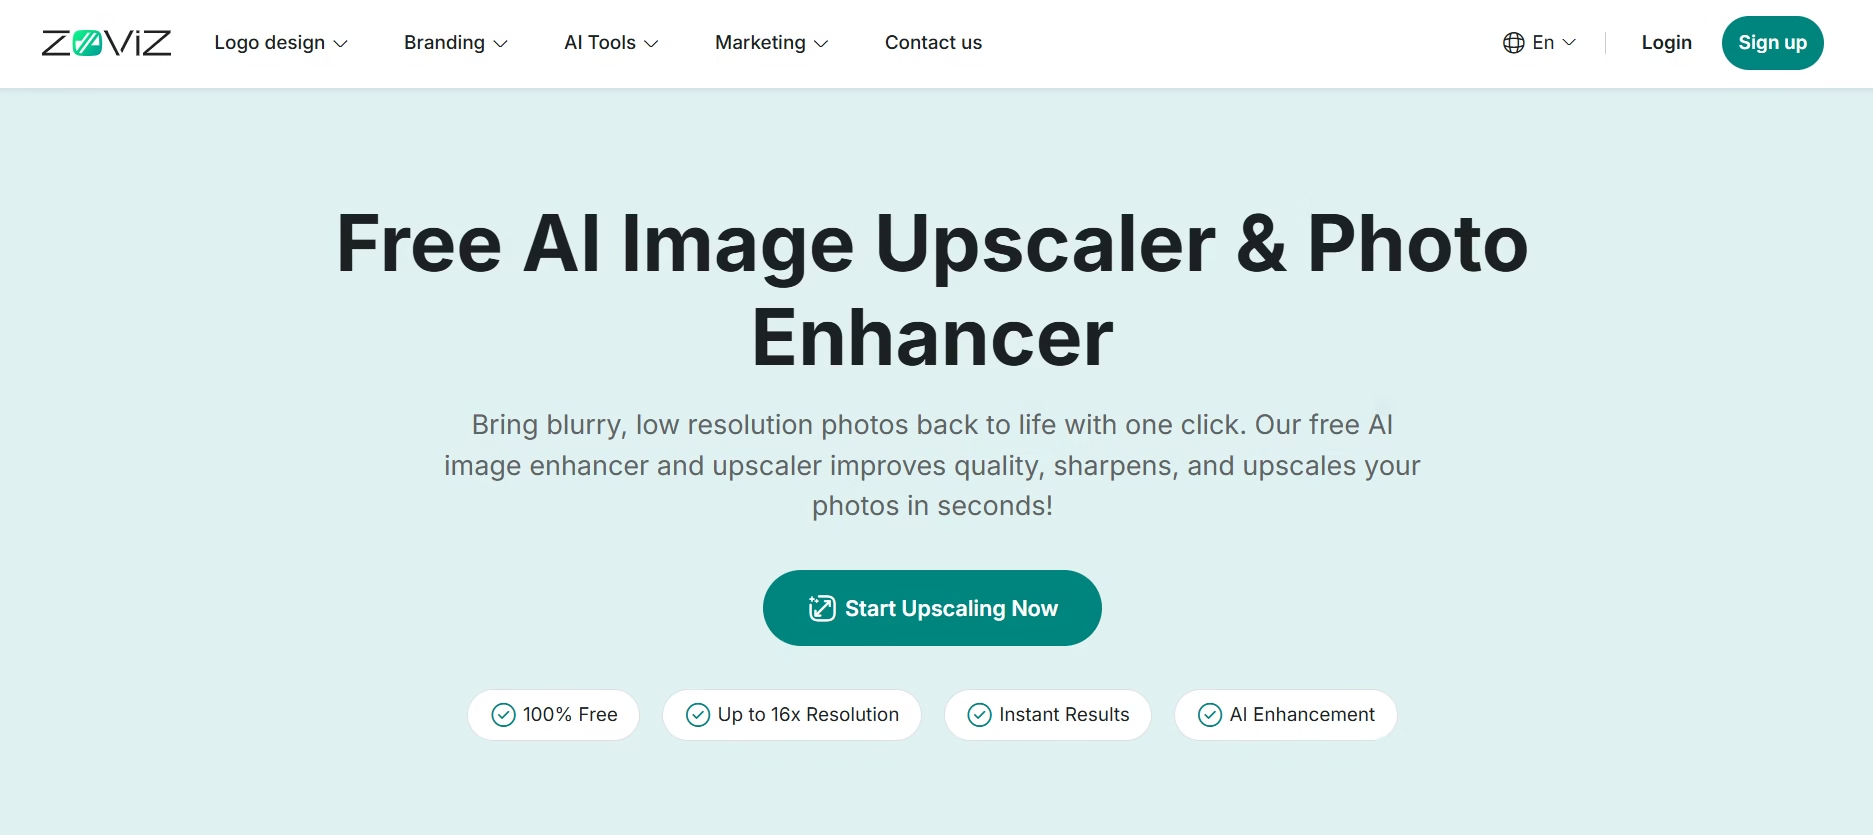
Zoviz is built for speed and simplicity. You upload an image, and within seconds, it gives you a sharper version without asking for a sign-up or adding a watermark. It works well for everyday use, like product images, blog visuals, or social media graphics.
The tool focuses on quick results. It enhances clarity, reduces noise, and keeps textures looking natural instead of over-processed. The interface feels clean, so there’s nothing to figure out before getting started.
What works well:
- No signup required
- No watermark on downloads
- Supports JPG and PNG formats
- Fast processing with real-time results
- Upscaling available up to 16x
How to use Zoviz:
- Upload your image (drag and drop or select file)
- Choose the upscale level (up to 16x)
- Let the AI process the image
- Download the enhanced result
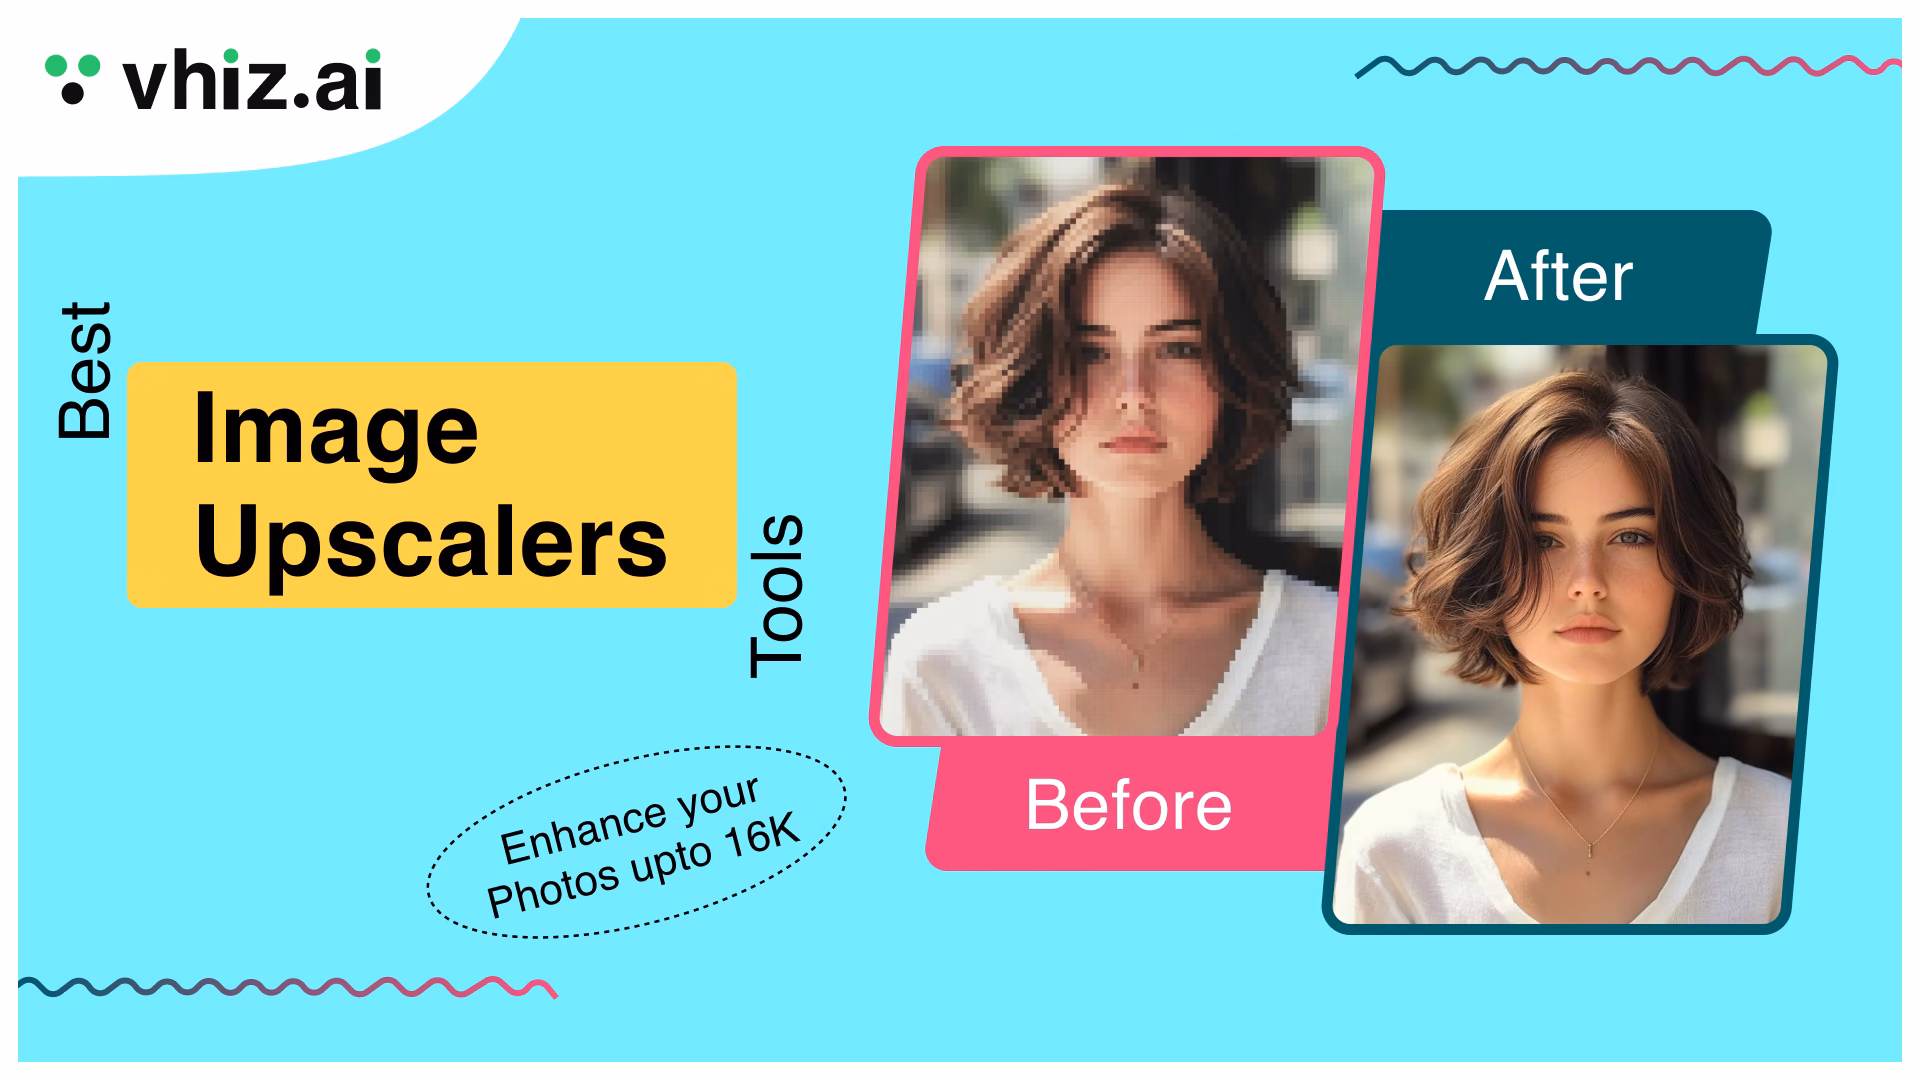
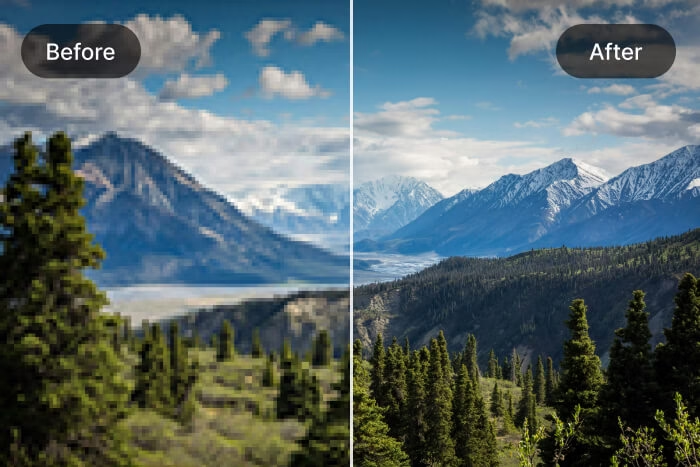
Before vs After Results
In this example, Zoviz was used to upscale image quality on a low-resolution landscape image to 16K. The original image appears soft, with blurry trees in the foreground and very little detail visible in the mountains. After processing, the difference is noticeable. The trees look sharper, edges are more defined, and the mountains regain their structure and depth. Colors also appear more balanced, giving the image a cleaner and more natural look.
Zoviz offers a free version with basic access, so you can try the image upscaler free experience without signing up.
For extended use, it’s part of a broader AI platform with paid plans:
- Starter Plan – ~$29/month: Includes brand kit, logo tools, AI image upscaler, and around 100 AI credits for automation
- Pro Plan – ~$49/month: More credits, multiple brand support, and expanded AI tools
- Business Plan – ~$99/month: Higher usage limits, team features, and advanced capabilities
Pixelbin
Pixelbin stands out as a solid image upscaler ai and optimization tool. It uses advanced algorithms to generate new pixels based on surrounding image data, which helps improve clarity without making the image look artificial.
The workflow is simple. Upload your image, choose an upscale level (2x, 4x, or 8x), and let the tool process everything automatically. It also includes extra editing features like cropping, resizing, and rotation, which make it more than just an upscaler.
What works well
- Easy to use, even for beginners
- Free upscaling options (2x, 4x, 8x)
- Supports PNG, JPG, JPEG, and WEBP
- No watermark on final images
How to Use Pixelbin
- Step 1: Visit Pixelbin or open its AI image upscaler tool
- Step 2: Click on “Upload” and add your image (you can also drag and drop or paste a URL)
- Step 3: Select the upscale level (2x, 4x, or 8x). The AI will process the image automatically
- Step 4: Download the enhanced image once it’s ready
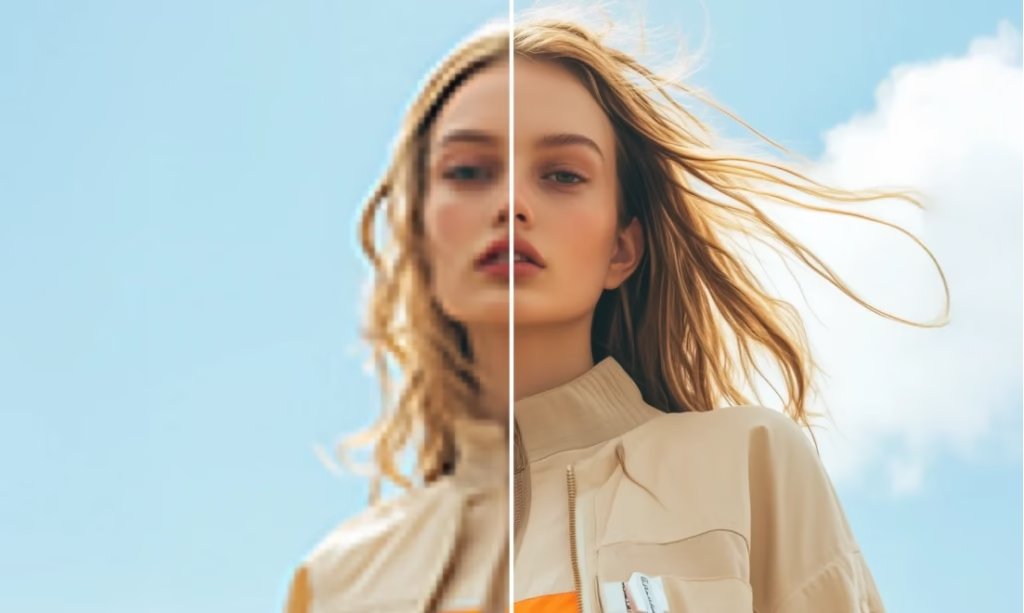
Before vs After Results
In this example, Pixelbin was used to enhance a low-resolution portrait image. The original image appears soft, with blurred facial features and weak detail around the hair and clothing. After upscaling, the improvement is clearly visible. Facial features become sharper, hair strands are more defined, and the overall image looks cleaner and more balanced.
Pricing
PixelBin offers a tiered pricing structure, including a “Free Forever” plan (3-45 credits/month), a “Pay as You Go” option starting around $0.33 per credit, and subscription plans starting from $9.00/month tailored for business, offering lower per-credit costs. It provides AI tools for image/video editing, with specialized pricing for video generation (e.g., 14-75 credits/video). Supports upscale images in bulk and works as a practical ai image upscaler free entry point for smaller jobs.
Upscale.media
Upscale.media is a beginner-friendly tool built on Pixelbin’s technology. It focuses on speed and simplicity. You upload an image, and within seconds, it gives you an enhanced version.
There is also a side-by-side preview, which makes it easier to compare results before downloading. It works directly in the browser and even has a mobile app, so you can use it on the go. For many users, this is the simplest way to upscale image online free.
What works well
- Free and fast upscaling (2x to 4x, sometimes higher)
- Simple drag-and-drop interface
- No signup required
- Mobile app available
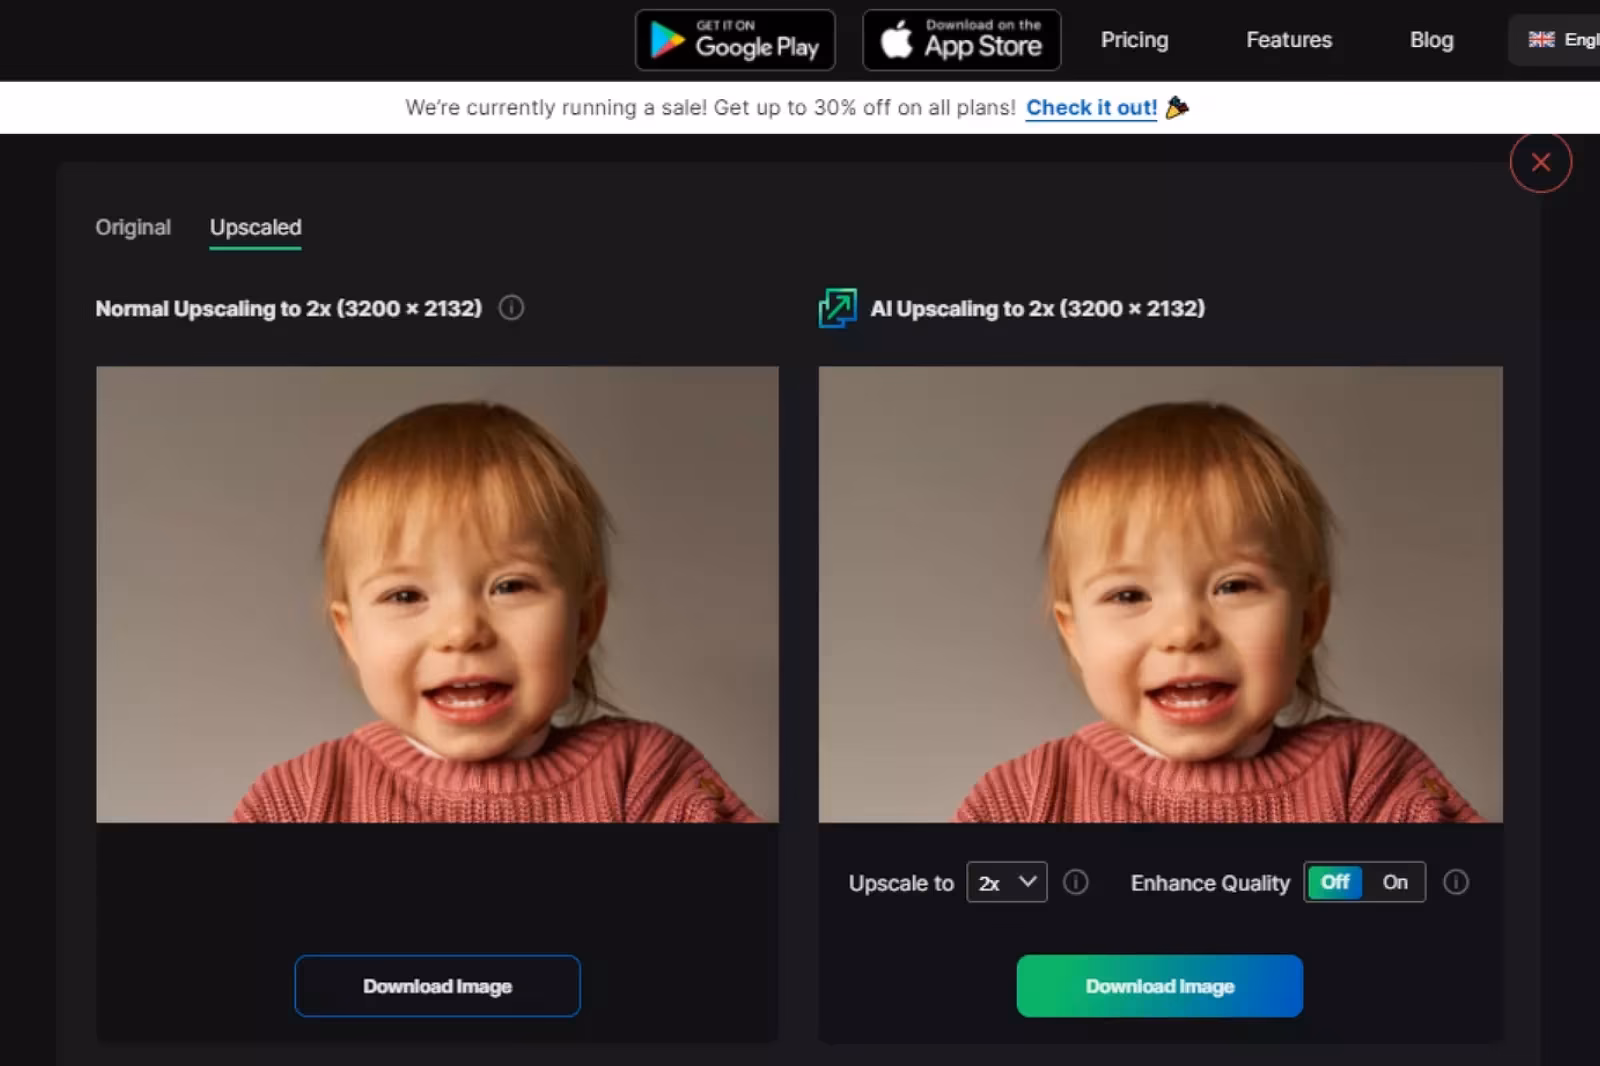
How to use Upscale.media
- Open Upscale.media in your browser
- Click “Upload Image” and select your file
- Wait a few seconds while the tool processes it
- Choose upscale level (2x to 8x if available)
- Toggle “Enhance Quality” if needed
- Download the final image
Before vs After
In this example, Upscale.media was used to enhance a low-resolution portrait image. The original image looks slightly soft, especially around the facial features and edges. After upscaling, the image becomes clearer, with better-defined facial details and smoother overall texture.
Pricing
Upscale.media offers a free image upscale plan, but it’s quite limited. You can only process a few images before hitting the limit.
Once you exceed that, you’ll need to switch to a paid plan. Pricing starts at $9/month, which gives you around 10 credits (10 images).
If you need more usage, higher-credit plans are available, but the model stays the same; you pay based on how many images you upscale.
Picsart AI Image Upscaler
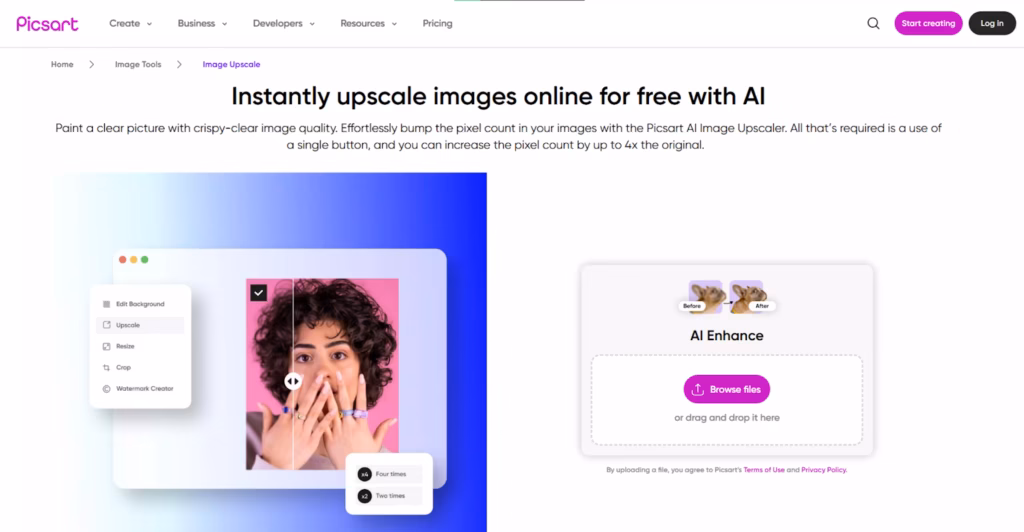
Picsart is a simple, widely used tool for quick image enhancement. It focuses on ease of use, making it a good option if you just want to upload an image and improve it without adjusting settings. It can also work as a free image upscaler online for light use.
The tool can upscale images up to 4x while maintaining sharpness and reducing blur. It also improves colors and cleans up grainy areas, which helps when working with older or low-quality photos. This is where people often look for an image upscaler 4k support tools.
It works on both mobile and desktop, so you can edit and upscale images from anywhere. After processing, you can either download the result directly or continue editing inside the platform.
What works well:
- Quick and easy to use
- Automatic AI upscaling (no manual setup)
- Reduces noise and blur effectively
- Good color and tone correction
- Available on mobile and desktop
How to use Picsart:
- Visit the Picsart image upscaler
- Upload your image using the browse option
- Let the AI process the image automatically
- Download the result or continue editing
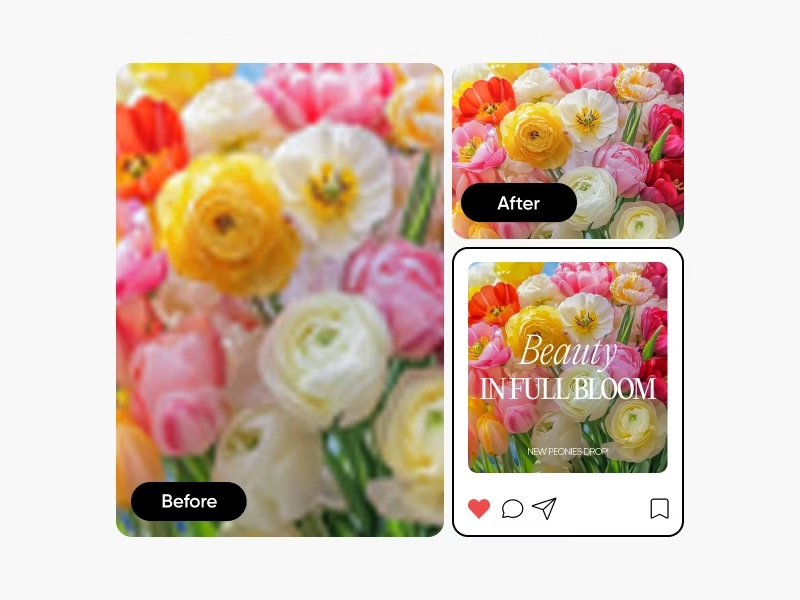
Before vs After Result
Picsart was used to enhance a low-resolution floral image. The original image looks blurry, with soft edges and washed-out details, especially in the petals. After upscaling, the flowers appear sharper, colors become more vibrant, and the overall image looks cleaner and more visually appealing.
Pricing
- Free Plan — $0/month
Basic editing tools, 5 credits/week, limited AI access, 100 MB storage - Pro Plan — $15/month
500 credits/month, full editing features, AI tools, bulk editing (up to 50 images), 100 GB storage - Ultra Plan — $45/month
2500 credits/month, advanced AI tools, bulk editing (up to 100 images), team features, 300 GB storage - Enterprise — Custom Pricing
Designed for businesses with API access and scalable usage
Let’s Enhance
Let’s Enhance is a cloud-based tool focused on ease of use. There’s no software to install, and the process feels straightforward.
You upload an image, choose the upscale type, and let it process. It supports upscaling up to 16x in some cases and also allows batch processing, which is helpful if you’re working with multiple images. That makes it useful for upscaling images in a workflow rather than doing them one at a time.
What works well:
- Easy to use with no setup required
- AI upscaling up to 16x
- Supports multiple image formats
- Batch processing for handling multiple images
How to use Let’s Enhance:
- Open Let’s Enhance in your browser
- Upload your image
- Select the upscale type and desired size
- Click “Start processing.”
- Download the enhanced image
Pricing
- Free trial: 10 credits
- Subscription: Starts at $9/mo.
- Pay-as-you-go: One-time bundles available.
Before vs After Result
Let’s Enhance was used to upscale a vintage-style image with noticeable blur and faded details. The original image appears soft, with unclear facial features and muted textures in the clothing and background. After processing, the image looks more defined. Facial features become clearer, edges sharper, and textures in clothing and surroundings more detailed.
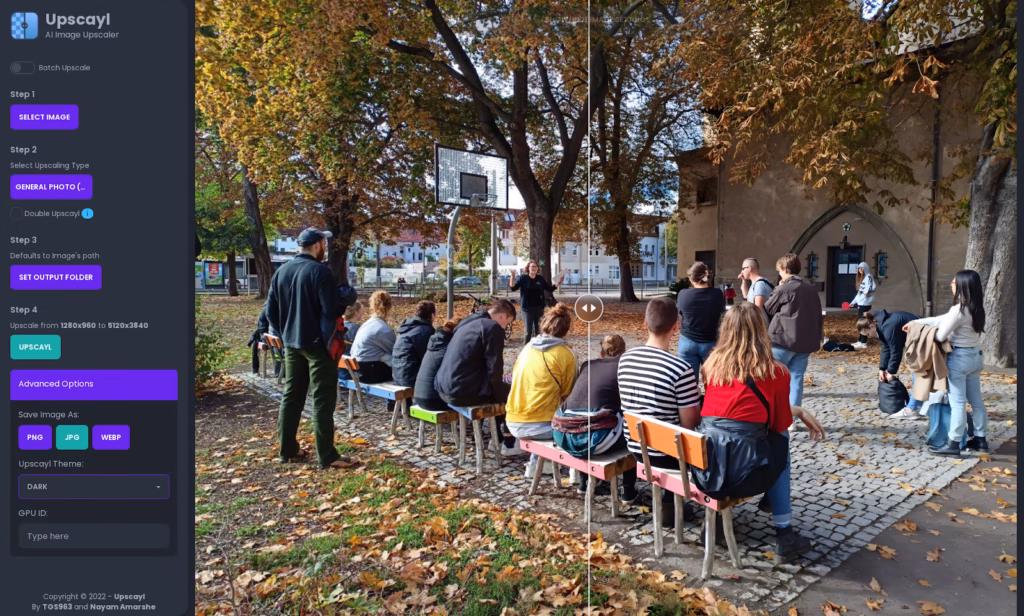
Upscayl
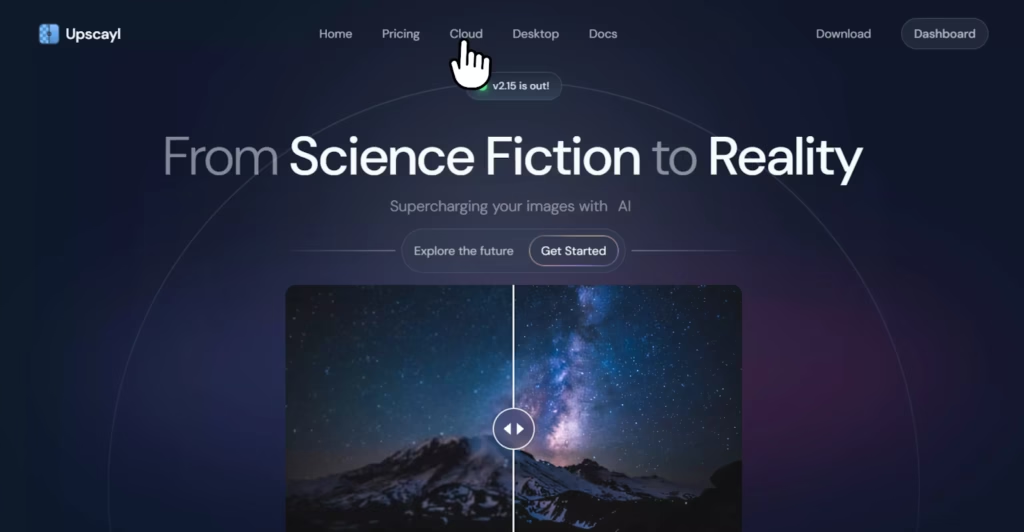
Upscayl feels a bit different from most tools on this list. It is open-source, which already makes it appealing if you prefer free, unrestricted tools. But beyond that, it actually gives you more control over how the image is processed. It is one of the stronger choices if you want an upscaler image free workflow on a desktop.
It uses Real-ESRGAN technology, known for handling detail well, especially in low-resolution images. You can choose different AI models depending on the image type. Photos, illustrations, and even anime-style visuals tend to respond differently, and Upscayl lets you adjust for that.
It runs as a desktop app on Windows and macOS, so you’re not relying on a browser. That can be useful if you’re working with multiple files or larger images.
What works well:
- Free and open-source
- Supports batch processing
- Multiple AI models for different image types
- Simple interface despite added control
How to use Upscayl:
- Open Upscayl (desktop app or cloud version)
- Click “Add Image” or drag and drop your file
- Select the upscale factor (2x, 4x, or higher if available)
- Choose the AI model if needed
- Click “Upscale” to process the image
- Save the final result
Pricing
- 100% free
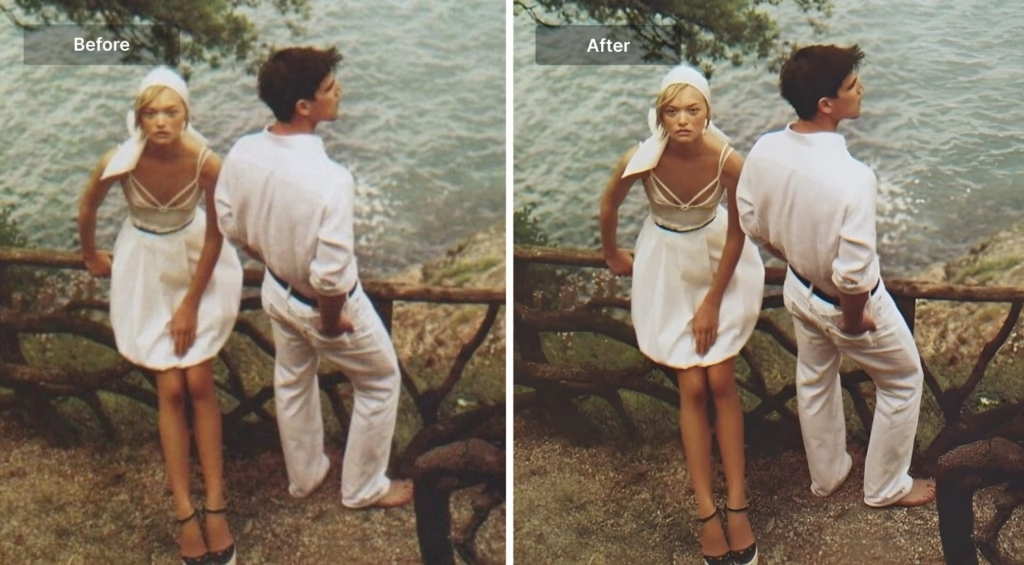
Before vs After
Upscayl was used to enhance a wide outdoor scene with multiple subjects. The original image looks slightly soft, especially in areas like tree leaves, ground textures, and background buildings. After upscaling, details become more defined. Leaves appear sharper, edges around people and objects look cleaner, and the overall image gains better clarity without looking over-processed.
How to Choose the Best Image Upscaler for Your Needs

Not every tool works the same way. The right choice depends on what you actually need from the image.
Scenario 1: Printing (Posters, Commercial Use)
If the image will be printed and viewed up close, quality matters the most.
What to look for:
- High upscale support (4x, 6x, or more)
- Strong detail reconstruction
- Handles large files
- Batch processing
Scenario 2: Social Media Content
For platforms like Instagram or TikTok, speed matters more than extreme resolution.
What to look for:
- Fast processing
- Simple, browser-based tools
- Basic sharpening and cleanup
- Easy export
Scenario 3: Restoring Old or Low-Quality Photos
Old images need more than resizing. They need cleanup and detailed recovery.
What to look for:
- Noise and blur reduction
- Strong AI reconstruction
- Facial detail enhancement
- Support for low-quality inputs
Advanced Tips: Achieving Clean 16K Upscaling
When upscaling to 16K, the goal is to improve clarity without making the image look artificial. Even at 16K, issues like blur or noise can show up if the process isn’t handled properly.
- Start with a high-quality source: The better the original image, the better the result. Avoid heavily compressed files for cleaner output.
- Avoid over-sharpening: Too much sharpening can make edges look harsh or unnatural. Keep adjustments minimal.
- Upscale in steps if needed: If the image is of very low quality, scaling gradually can help maintain better detail.
- Keep editing in one workflow: Try to enhance and upscale within the same tool to avoid quality loss between steps.
- Use batch processing for multiple images: For larger projects, batch processing saves time and keeps results consistent across all images.
Final Thoughts
An AI image upscaler improves image quality by increasing resolution to 16K while preserving details and keeping them natural. Instead of simply stretching pixels, it rebuilds textures and edges, so images hold up better on larger screens or when zoomed in.
Both free and paid tools are available. Some are better for quick, everyday use, while others are built for higher-quality output and bulk processing. This guide covered the most useful options and how to choose based on your needs.
Pick a tool that fits your workflow and use it to turn low-quality images into clean, 16K-ready visuals. A good image upscaler free online tool can be enough for basic jobs, while a stronger paid option may suit heavier work.
FAQs
Is it possible to upscale images to 16K without losing quality?
Yes, but results depend on the original image. High-quality inputs give much better results, while very low-quality images may still show some limitations.
Which image upscaler is best for beginners?
Tools like Zoviz, Upscale.media, and Picsart are easier to use. They require minimal setup and deliver quick results.
Which tool is better for professional use or printing?
Tools like Let’s Enhance are better suited for professional work because they offer stronger detail reconstruction and higher-quality output.
Can image upscalers fix old or blurry photos?
Yes. Many tools include noise reduction and detail enhancement, which help restore older or low-quality images.
Do I need editing skills to use these tools?
No. Most image upscalers are designed to be simple. You upload an image, choose the scale, and download the result.